
Photography Wall Art for Living Room: Style Your Space
Key Takeaways
- Photography wall art for living room success starts with theme, color, and scale that match your furniture and lighting;
- Layouts like a clean grid, linear trio, or eclectic salon wall make curation simple, and Mixtiles let you test, move, and perfect without nails;
- Use eye-level hanging rules, consistent spacing, and a plan-on-the-floor method to get pro results fast;
- The Mixtiles app previews your photos on the wall, ships ready to stick, and lets you refresh your living room in minutes.
Photography wall art for your living room should feel personal, polished, and easy to update. Whether you love black and white architecture, sunlit coastal landscapes, or candid family moments, the right photography can anchor your space and tell your story. In this guide, you will learn how to choose themes and colors, pick sizes and layouts that fit your walls, hang at the perfect height, and style different decor looks. We will also show how Mixtiles make it nail free, stress free, and totally flexible.
Ready to see your living room transform? Upload your photos to create beautiful canvas prints or explore our curated gallery walls. Preview them to scale on our app or website and get lightweight, damage-free frames with fast delivery.
What makes great photography wall art for a living room?
Great living room wall decor starts with subjects you love, colors that complement your palette, and a layout that respects your furniture and light. Choose a statement photo or a cohesive set, then keep spacing consistent so the whole arrangement feels intentional. Mixtiles make this easy because each piece is lightweight, adhesive, and repositionable, so you can refine the look without tools.
Begin by aligning subject matter with your lifestyle. Travel cityscapes, nature photography, abstract art, still life, portraits of people, or even a custom ai pet portrait all work if they reflect your story.
Next, consider color temperature. Warm brown, gold, and red can cozy up rooms with warm lighting. Cool blue and green create calm in bright, modern spaces.
Finally, balance visual weight. If your room already has bold patterns, try a single oversized art print or a minimal black and white series. If your decor is simple, a gallery collection of smaller frames adds energy without clutter.
Why Mixtiles work here is simple: no nails, no wall damage, and no commitment. You can create a new layout for an event, shift pieces seasonally, or swap family photos with fine art prints from our licensed collection. Everything ships ready to stick and is safe for most painted walls, textured walls, and even some brick and wallpaper surfaces. If you are new to this format, learn what photo tiles are and how they compare to traditional frames.
How do I choose the right theme and color palette?
Pick a theme that mirrors your daily life, then let your existing textiles lead the palette. If your rug has coastal blue and sandy beige, try beach landscapes with soft light. If your throw pillows are modern and monochrome, consider black and white photography to keep the look cohesive.
Popular themes that always work
- Nature calm is a timeless choice: try beaches, forests, botanicals, and soft water scenes for gentle movement and a soothing look in your living room or bedroom.
- City energy suits modern or industrial styles. Architecture details, bridges, and street photography add grit and structure.
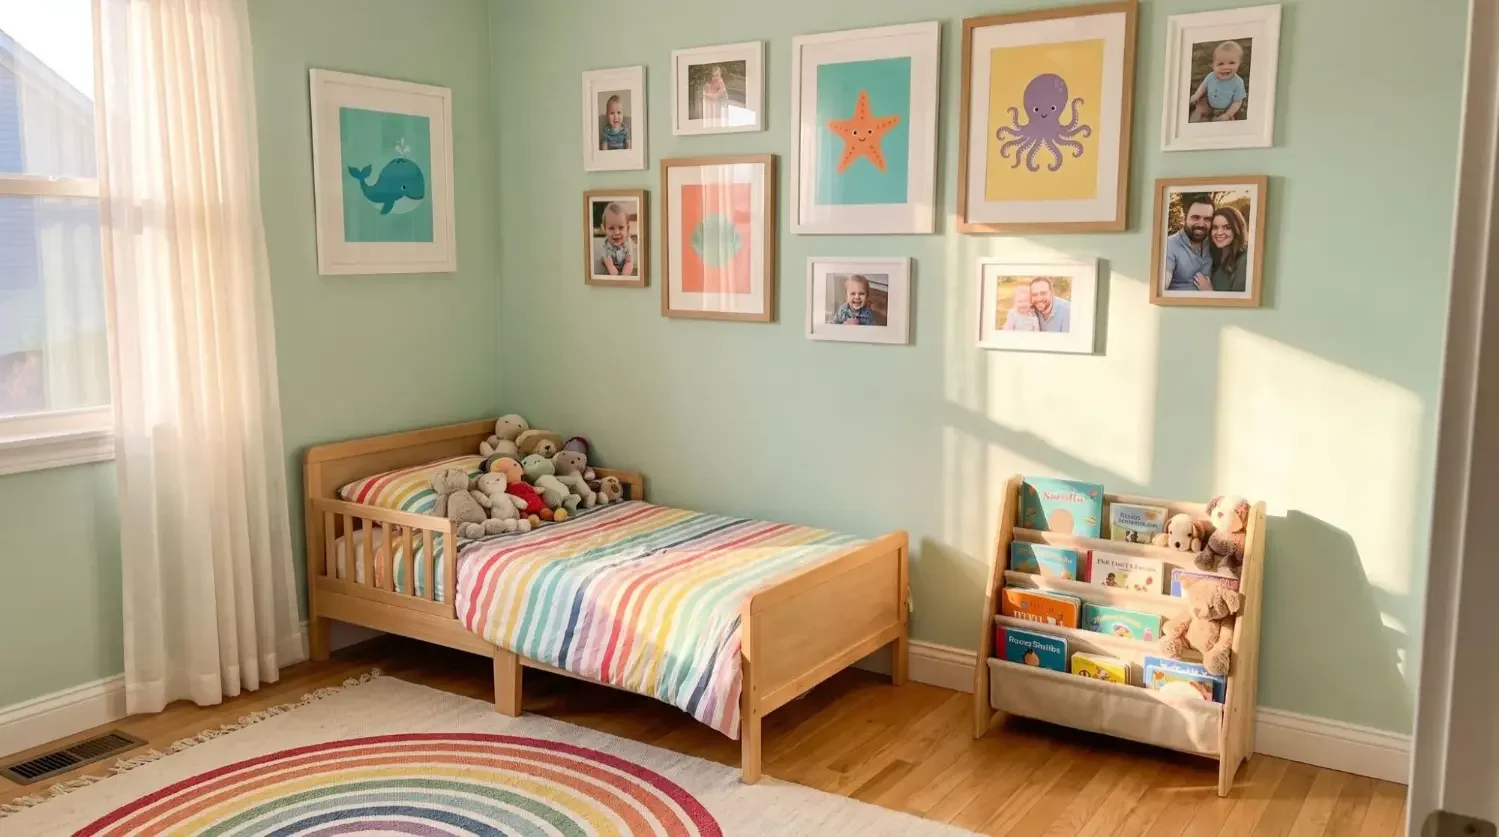
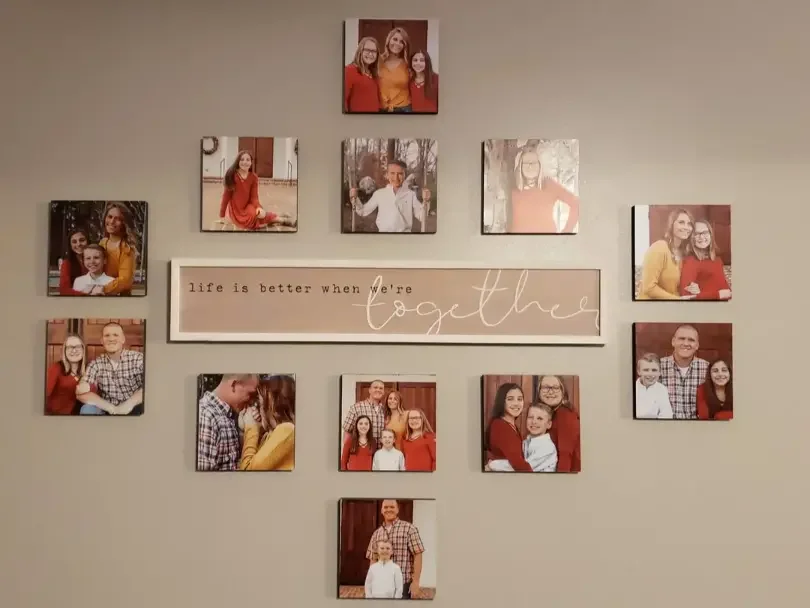
- For warmth, build a family narrative using candid photos, milestones, and a beloved pet portrait.
- Travel memoirs keep memories alive in your home decor: mix panoramas, doorways, and still life moments discovered on the road for a personal gallery wall.
Color strategies that pull a room together
- Monochrome magic simplifies visual noise. A clean set of black and white photos can unify different subjects, from people to landscapes.
- Tonal harmony is easy. Pull a color from your rug, curtains, or throw, then echo it across a series of art prints.
- If your living room is neutral, a single bold accent in yellow, pink, or deep blue creates a stunning focal point.
- For a fresh look year round, rotate palette by season. Mixtiles stick and restick, so swapping coastal summer scenes with green forests or snowy whites in winter takes minutes.
What sizes and layouts fit common living room walls?
Most living rooms look best when the total width of your wall art equals about two thirds of the sofa length. Combine that with eye level centering and even spacing to get a professional result. Choose one large canvas or framed photo for a minimalist style, or build a grid of canvas pictures if you want more movement.
Measure once, style forever
For the sofa wall, target an arrangement that is roughly two thirds the width of the sofa. Keep the bottom of the art about 6 to 8 inches above the back cushion so the grouping feels connected to the furniture. Around a TV or console, use asymmetry to balance the electronics. Pair a vertical column of Mixtiles on one side with a smaller stack on the other to frame the screen without crowding. In corner nooks and small spaces, try a vertical stack or staggered pair to draw the eye up and save floor space.
Go-to layout templates
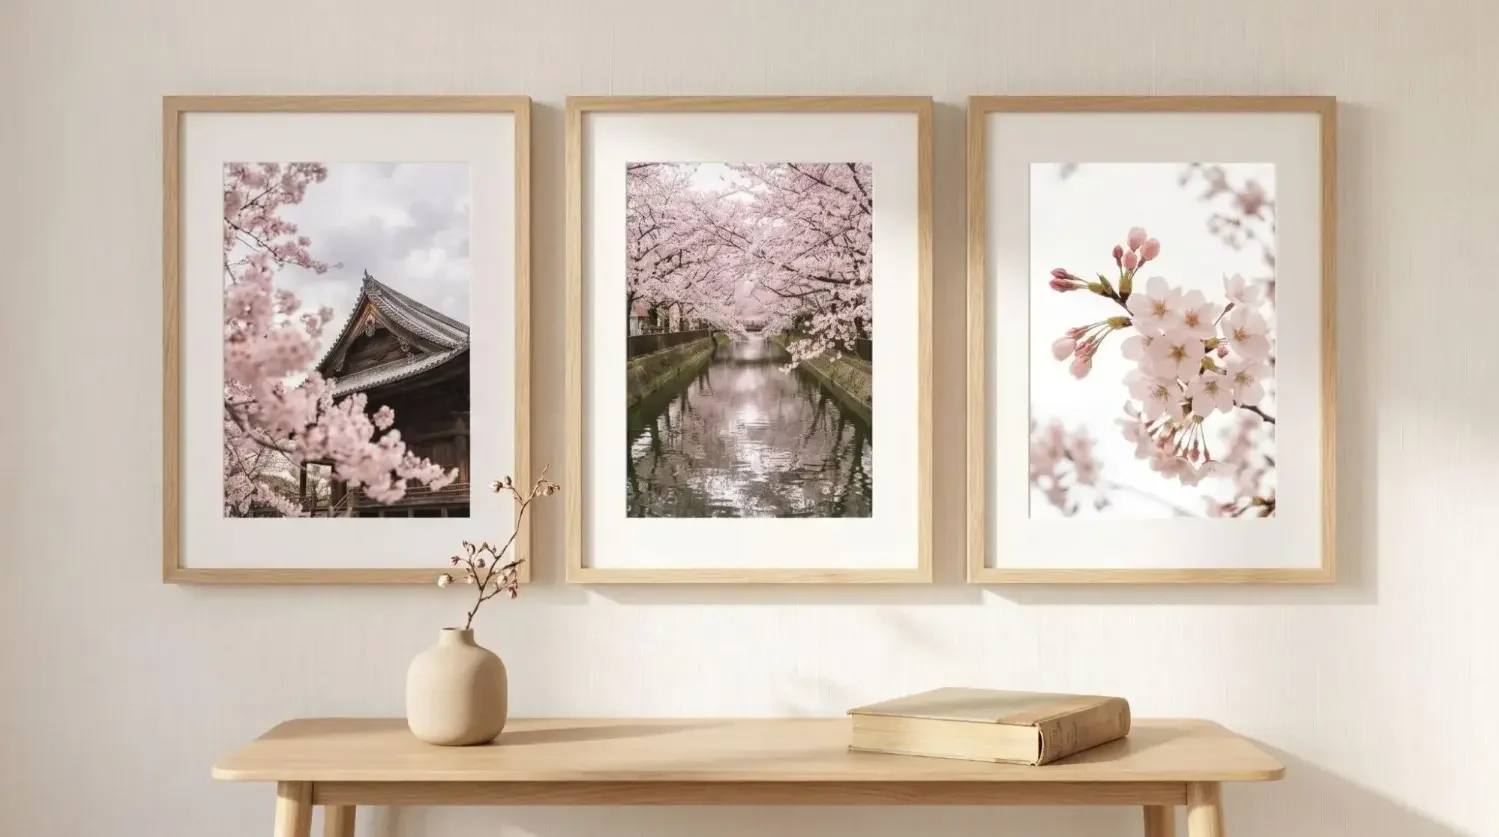
A clean grid, like 2 by 3 or 3 by 3, delivers a modern look and works beautifully with uniform Mixtiles frames. A linear trio is perfect over a console or loveseat. A salon wall mixes sizes and orientations for an eclectic feel, anchored by one hero image. For a refined contemporary look, split one scene across two or three panels to create a diptych or triptych. Mixtiles gallery wall kits include ready to hang templates that take the guesswork out of spacing and scale.
Quick measuring formula
Place the center of your arrangement between 57 and 60 inches from the floor. Hang 6 to 8 inches above the sofa back. Keep spacing consistent at about 1.5 to 2 inches between frames for a tidy gallery look. If your ceilings are very high, you can nudge the center slightly higher to keep proportions balanced.
How high should I hang and how do I get spacing right?
Center your arrangement at traditional gallery height, roughly 57 to 60 inches from the floor, then adjust slightly for tall ceilings or a high backed sofa. Keep the gap between frames consistent for a neat finish. The easiest method is to plan on the floor first. Arrange your photos, snap a picture, then transfer the layout to the wall. With Mixtiles, stick lightly at first, step back, and nudge into perfect alignment. No nails or levels are required, though a small level helps for large grids. For step-by-step visuals, see how to hang photo tiles.
Mixtiles are designed to be gentle on walls and work on most flat painted surfaces. Many customers place them successfully on textured walls, brick, and wallpaper. Press for a few seconds to help the adhesive grip. If you ever move, lift each tile upward to remove cleanly, then cover the adhesive with wax paper for storage.
Should I choose black-and-white or color photography?
Choose black and white when you want classic, quiet elegance that unifies different subjects like people, animals, and architecture. Use color when you want the art to tie together accent hues in your rug, pillows, and throws.
A hybrid approach is popular: build a black and white core, then introduce a single color pop like a yellow taxi or a pink umbrella for a contemporary focal point. Test both in the Mixtiles preview to see which complements your light and furniture best.
How can I create a gallery wall without nails (the easy way)?
A beautiful gallery is simple with adhesive, repositionable frames. Curate a set with a unifying thread, place everything on the floor to finalize spacing, then stick and restick on the wall until it feels balanced. Mixtiles gallery wall sets and wall signs remove guesswork, and you can always add a canvas tile for depth. This quick tutorial on how to hang tile art on a wall can guide your first install.
A no-stress, step-by-step plan
Follow these steps to go from camera roll to wall in one afternoon.
- Curate 6 to 12 photos with a clear thread like theme, palette, or mood;
- Standardize edges by choosing the same frame style, then vary compositions for interest;
- Lay the set on the floor, finalize spacing, and snap a reference photo;
- Stick Mixtiles on the wall, start from the center, and adjust until spacing feels right.
Gallery wall recipes to copy
Use these ready to try formulas when you want a polished result fast.
- Travel Story: city facades, doors, skyline, and one close up texture for variety;
- Family Timeline: moments from baby to now, include pets and candid laughter for warmth;
- Nature Calm: coastlines, leaves, misty forests, and still water in soft green and blue;
- City Grit: architecture details, stairwells, and street typography in high contrast black and white.
Build your gallery wall now. Choose your favorite photos for our classic photo tiles, and preview your layout to scale in the Mixtiles app. No nails or measuring tape required, and shipping is fast.
What living room styles pair best with photography wall art?
Photography fits almost every decor style because you can tune subject, color, and frame finish. Match the mood of your room, then choose frames and materials that echo your furniture and lighting.
Modern or Minimal

Try one oversized art print or a tight 3 by 3 grid. Black frames and monochrome or muted palettes emphasize clean lines and contemporary space.
Scandinavian

Lean into nature, negative space, and soft neutrals. Light wood or white frames and fine art photography of still life botanicals or snowy landscapes look airy and calm.
Coastal or Boho

Beach scenes, palms, and warm film style light feel relaxed and lived in. Use white or natural frames and a mix of blue, sand, and green tones for effortless wall art.
Traditional or Transitional

Landscapes, portraits, and classic architecture bring timeless elegance. Choose black or dark wood frames and balanced compositions for a refined look in your living room.
Industrial

Urban abstracts, bridges, steel details, and gritty textures shine in black frames. High contrast black and white photography reinforces the architecture of the room.
Maximalist or Eclectic

Mix subjects and eras freely, then unify with a consistent frame color. Add one statement hue like gold, green, or red to pull the whole gallery together.
How do I prep photos for crisp, high-quality wall art?
Start with high resolution files, even lighting, and clear compositions. Small edits go a long way. The Mixtiles editor helps you crop, align, and preview before you order.
File and quality checklist
For sharp prints, target about 300 DPI at the final print size and avoid heavy crops. Fix color casts, lift shadows gently, and sharpen sparingly so textures in landscapes, animals, and people look natural. Compose with a strong focal point. Use the rule of thirds, or try centered symmetry for architecture and still life. Leave breathing room around the subject so the frame does not feel crowded.
From phone to wall in minutes
Import favorites from your camera roll, Google Photos, or iCloud into the Mixtiles website or app. Test square, portrait, and landscape crops. Then preview on a virtual wall to check scale above your sofa or console. If you are building a gallery, swap image order until the flow feels right. Add a printed border for a fine art look, or choose canvas tiles for an elevated, gallery style finish. To understand the process from selection to print, explore how to make photo tiles.
Framing and care
Pick a consistent frame style for cohesion across your collection. Clean your wall decor with a dry, soft cloth, and avoid sprays. Keep photography out of direct, harsh sunlight to preserve color. Mixtiles are lightweight and designed without glass, which reduces glare and makes installation safe and simple for renters and homeowners.
Need fresh inspiration? 10 on-trend photography wall art ideas
Steal these quick ideas to bring new energy to your living room, bedroom, or bathroom. Each one works with framed art prints or canvas prints, and you can shop your own photo library to make it personal.
- Oversized single horizon over the sofa;
- Black and white architectural diptych for a modern look;
- Soft botanical macro grid, three by three, in white frames;
- Coastal triptych in airy whites with beach and water scenes;
- Candid family laughter line of five for a warm home story;
- Local landmarks in muted tones for subtle city pride;
- Pet portrait wall with one bold color pop like yellow or pink;
- Abstract shadows series in black and white for contemporary style;
- Seasonal swap from summer coast to winter forest green;
- Film style travel shots with warm light and gentle grain.
Photography wall art is the easiest way to make your living room feel designed and deeply personal. Start with a theme and palette, pick a right sized layout, and hang at eye level with consistent spacing. With Mixtiles, you can preview, stick, and restick until it is perfect. No nails, no stress, just a living room that finally looks like you.
Turn your favorite photos into ready to hang wall art now. Open the Mixtiles app or shop on our website to upload and preview your design. Explore our collection and create matching gifts like custom photo books, all with fast delivery.
Frequently Asked Questions
How do I decorate a living room wall with photos?
Pick a theme and palette, standardize frames, then plan your layout on the floor first. Aim for even spacing and eye-level centering. Start from the middle on the wall, step back, and adjust. Mixtiles stick and restick, so tweaking placement is simple.
What are the basic rules for living room wall art?
Use the two-thirds rule for scale, your artwork should span about two thirds of the furniture width. Keep 1.5 to 2 inches between frames, and hang 6 to 8 inches above the sofa back. Choose a cohesive frame style to unify different photos.
What is the two-thirds rule for wall art?
The two-thirds rule helps with proportion. Measure the width of your sofa or console, then plan an arrangement that is roughly two thirds of that width. For a 90-inch sofa, target about 60 inches of total art width for a balanced look.
What is the 57-inch rule for hanging pictures?
The 57-inch rule sets the art center at about 57 inches from the floor, close to average eye level. Adjust slightly for tall ceilings or high-backed furniture. Over a sofa, keep the bottom edge about 6 to 8 inches above the back cushion.
Be the first to know — deals, news & decor ideas.
By clicking you agree to the Terms of Use & Privacy Policy